
Woven Vest - My Way
Today’s post is about a project I’ve had on my mind for probably five or six years. The time was right to do it finally. The vest is inspired by a design by Nancy McRay and published in Handwoven magazine's September/October 2009 issue. The original project, woven on a rigid heddle loom, created five sections on two different narrow warps joined to form the vest. I made several alterations to the original design to make it my own.
Reasons I Chose this Project
I liked the finished project. It is something I will wear and enjoy.
While I can sew, I’m not too fond of it. This aversion has kept me from making garments. However, this project's construction employs knitting and crochet skills found in my toolbox.
I wanted to weave with wool for my vest. The inspiration project uses Harrisville Shetland wool at the same sett I’ve used for other projects. So I knew the yarn and sett would successfully provide a desirous fabric.
The final dimensions of the inspiration vest are consistent with my sizing. (However, the author gave directions on adjusting circumference or length if needed.)
The author states several other reasons that this project appealed to me.
Garments made from narrow strips have several advantages. They can be planned to have no leftover fabric scraps! Styling, shaping, and trim can be worked at many points during weaving, assembly, and finishing.
My Alterations
I wove the project on a table loom rather than with a pick-up stick on a rigid heddle loom.
The original project was woven in plain weave and basketweave. Instead, I chose a broken twill threading and designed four twill variations.

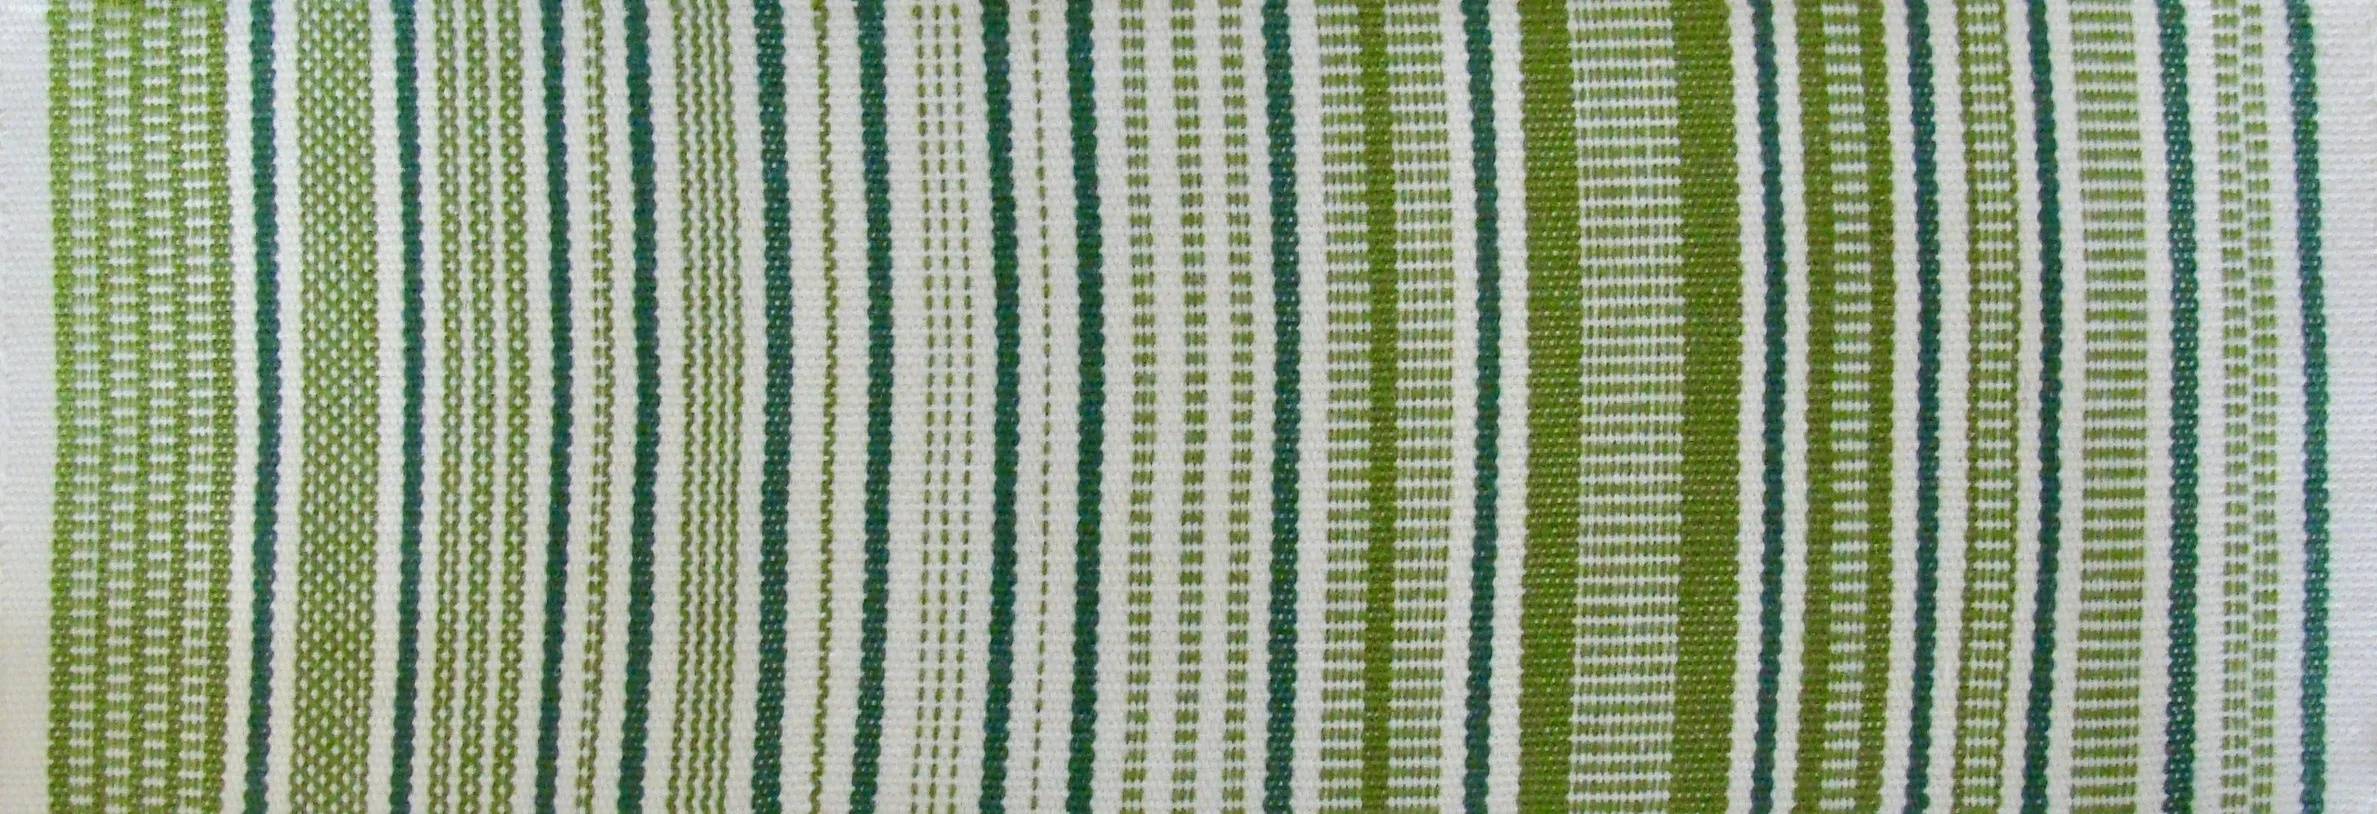
Melon warp, Mustard & Woodsmoke weft yarns, on loom.
The inspiration project used a 2-color warp of Harrisville Shetland (Topaz & Garnet) yarn and three colors for the weft Harrisville Shetland (Garnet, Topaz, & Bluegrass). I loved the overall autumnal color scheme. I chose Harrisville Shetland Melon (red-orange) for my warp and Harrisville Shetland Mustard (yellow-orange), and Woodsmoke (blue-green) for my weft yarns.
Since I had decided on a single color warp, this necessitated a creative approach to achieve pleasing color patterns without the alternating second color in the warp. For example, in place of weaving plain weave in Garnet on the 2-color warp of Topaz & Garnet, I used a 3/1 twill with Melon warp and Mustard weft. The result is a cloth with more Melon showing as would have occurred in the original piece with Garnet.
The original project used basketweave at the waistline, adding shaping by creating additional draw-in when the garment was wet-finished. I used a 1/3 weft-predominant twill to achieve a similar effect in those areas.
Creating the Drafts
I designed four different twill patterns in iWeave-it software.
Pattern A - 2/2 Reverse Twill Extended (Point) treadling.
Pattern B - 1/3 Filling Face (Weft Predominant), straight draw treadling, 2-color.
Pattern C - 3/1 Warp FaceTwill that I modified by using two sheds instead of three in one pick of each sequence; 1-4 instead of 1-2-4 in the sequence. The effect creates a subtle difference of a 2-thread weft float every fourth pick.
Pattern D - 2/2 Broken Twill.
Warping Notes
I wound two warps. Warp 1 was a 7-yard warp of 64 ends. Warp 2 was a 4-yard warp of 20 ends. Warping from back to front, I wound both warps together for 84 ends and width in the reed of 7”. When I reached the end of winding Warp 2, I carefully taped the ends to the separator paper. I continued winding on the remaining 3 yards of Warp 1.
After weaving pieces 1, 3, and 5 on Warp 1, I cut them from the loom. I threaded and sleyed the loom with the additional threads of Warp 2. From Warp 1, I cut off about 12” of loom waste to even the ends. Then both warps were tied onto the front beam. The method worked exceedingly well with absolutely no tension issues.
I did not use a floating selvage, preferring to catch the selvage thread as needed manually.

Weaving Notes
PIECES 1 & 5
I wove Pattern A for 8", Pattern B for 4", and Pattern C for 6" for each piece.
PIECE 3
I wove Pattern A for 8”, Pattern B for 4”, and Pattern C for 14”.
PIECES 2 & 4
For each piece, I wove Pattern A for 8”, Pattern B for 4”, Pattern D for 28”, and Pattern B for 4”, Pattern A for 8”.
Between each piece, I wove four picks of fusible thread, then a cutting line thread, then another four picks of fusible thread.
Assembly
The fusible thread was set using an iron on the wool setting.
The fabric was cut apart into five panels.

The seams were crocheted together using the Woodsmoke yarn and a size 3mm hook. I followed the instructions given in the original article. Working from the fabric's front side, I inserted the crochet hook into the space between the second and third threads on the woven panel. The original article stated to pick up between the first and second threads, but I found this too flimsy. The single crochet stitch alternated between the two panels’ sides.
A double-turned ½” hem was hand-sewn along the bottom of the vest. I used the Melon yarn as my thread. I find that using the same weaving yarn ensures a perfect color match, and there is no differential shrinkage in using a different type of thread.

Using a size 3.5mm circular knitting needle and Melon yarn, I picked up 320 stitches from the vest’s lower right front around the neck to the lower left front. Three inches were knitted around the vest to form the collar and front band, and three buttonholes were made. The stockinette stitch creates a pleasing rolled edge.
Using a size 3.5mm circular knitting needle and Melon yarn, I picked up 106 stitches around each armhole opening. Three rows were knitted, finishing the edges of the armholes.
Finishing
After assembly, the vest was fulled in the washing machine using warm water and Soak laundry soap. I used the delicate cycle in intervals of 30-60 seconds for a total of 4 ½ minutes. Then the vest was spun dry. Immediately after removing it from the washing machine, the backside was given a hard press with an iron on the wool setting.
I laid the vest flat and rolled the knitted collar and front bands into shape, keeping the bottom part of the bands flat. It took about 24 hours to dry completely.

Three buttons were sewn in place.
Final Thoughts

This project was my first time making a woven garment. I enjoyed using knitting and crocheting for assembly and finishing; however, there are several things I learned and would improve on in my next piece. First, while the woven 1/3 twill panels exactly matched in length, one of them looks a little offset when crocheted together. Despite my best efforts, this offset is not from the weaving, but the crochet join. Next time, I will be even more vigilant and more careful about stitch size. Fortunately, this is barely noticeable when the vest is worn.

Similarly, my pick-up count for the yarn collar and front bands was close but not exactly the same on either side. I did not think this would make much difference, but after finishing, it showed a slight difference from one side to the other. Again, this is not noticeable when I wear the vest.

I am exceptionally pleased with the finished project's look, feel, and fit! As anticipated, there is a bit of waistline shaping created from the draw-in of the 1/3 twill of the B pattern. The woven fabric is ideally suited for a vest I look forward to wearing this Fall.

Resources
McCray, Nancy. (2009, SO). You can weave clothing on a very narrow loom! Handwoven, 36-38.
Winslow, Heather. (2006). A primer for adding knitted and crocheted trims to handwoven cloth. Interweave.