
Painting Skeins
In the last post ‘Dyeing a Pyramid’, I shared a teaser, a photo of a skein of hand painted yarn. Now, here’s the story.

A few weeks ago I held a dye workshop for our Guild members. Besides having a day filled with fun and fellowship, we managed to create a stunning collection of hand painted yarn.
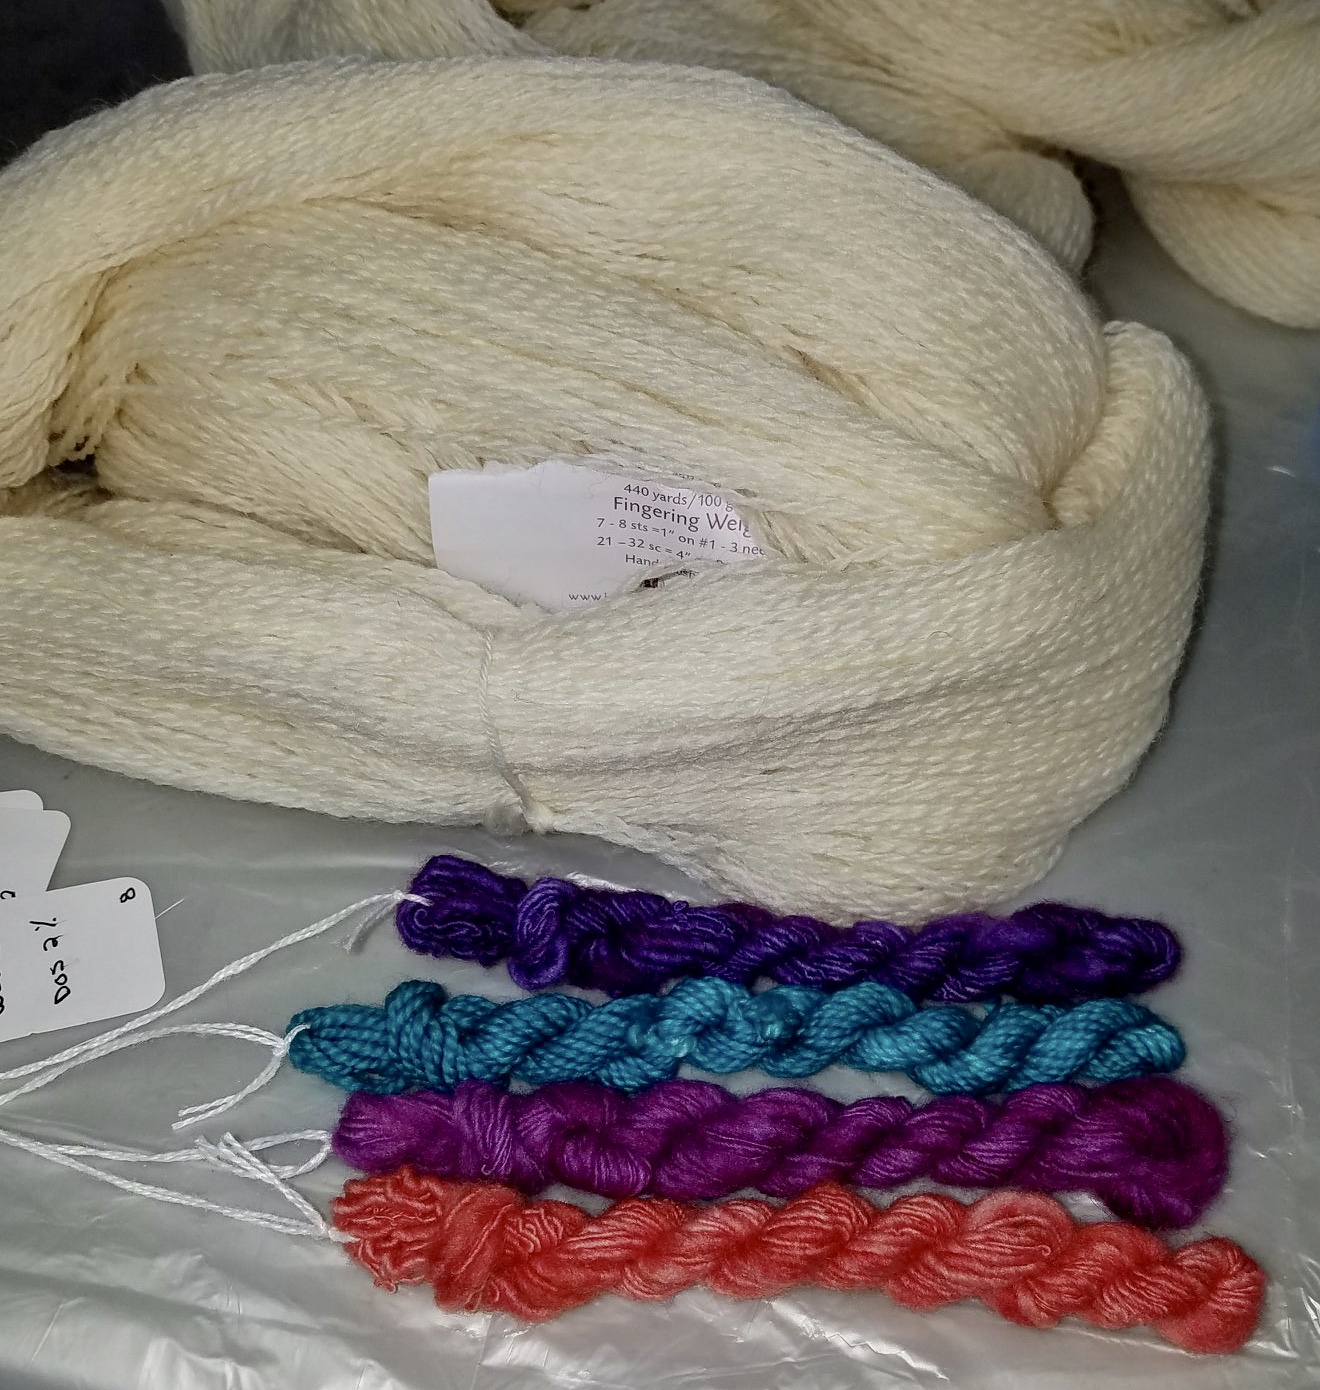
Each person chose four or five colors from the 28 mini skein samples I had dyed. You can also choose to leave undyed area(s) of white as one of the “color” choices.
Our yarn base was Knit Picks Bare Palette, 100% Peruvian Highland Wool, fingering weight, 440 yards/100 grams. We thought this would be a versatile yarn for both the knitters and the weavers in our group.
Tip - Keep the original yarn label for a record of the yarn weight, fibers, and yardage. Of course, you can also add the dye colors and percentages if you want.
If you refer back to the previous post, Dyeing a Pyramid, I had mixed three dye stock solutions of yellow, blue, and red to create the 28 colors in this palette. Each of these stock solutions were 1%. Desiring a medium depth of shade, we needed to dye with a 2% percent dye solution.
Thinking caps on, here comes the math.
If four colors were chosen to hand paint our 100 gram skein of yarn at 2% depth of shade (DOS), then:
Weight of each skein = 100 grams
Depth of shade = 2%
Dye Stock solution = 1% (1 gram dye/100 milliliters)
100 grams fiber x 2 DOS = 200 grams dye or 200 milliliters of dye per skein
200 milliliters of dye solution ÷ 4 colors = 50 milliliters of each dye color solution
Easy peezy if your are using a primary color, say Yellow, you would use 50 milliliters of yellow dye stock solution to paint a 1/4 section of the skein.
But what if you wanted Medium Rose, a mix of 80% red stock solution and 20% blue stock solution.
80% (0.8) x 50 milliliters of total dye solution = 40 milliliters of red dye stock solution
20% (.20) x 50 milliliters of total dye solution = 10 milliters of blue dye stock solution
Mix 40 milliliters of red + 10 milliliters of blue = 50 milliliters of Medium Rose dye solution
Next color . . . .
Since this was just a one day workshop (and I go to bed early), my fellow Guild members were not unhappy that I did all the math and mixed the solutions for each of their color combinations!

Pearl asks, “So we have our yarn and our color choices, what next?” Well break for lunch of course - Pete’s homemade pizza!!!! It is to “dye” for! (pun intended :-)

Now, we’re ready for a full afternoon of dyeing. Here’s an overview of the steps:

Bare Palette yarn comes with several ties in place, but to prevent tangling we added two more loose cotton ties just for good measure. The skeins were wetted in tap water prior to dyeing.

A word about color placement decisions.
Our skein circumference was about 1 1/2 yards, therefore the color sequence would occur in multiples of 1 1/2 yards, something to keep in mind when planning a project whether that be knitted or woven. For example, in a 3 yard warp, there would be two color sequence repeats . . . roughly . . . if the warp length was exactly the same as the circumference of the yarn. Note the colors may be reversed on the return while winding around a warping board or using a direct warping method.
In a true hand painted warp, the threads would first be measured (number of ends and length) for the weaving project and then the dye applied. This allows the color repeats to occur in a desired pattern, in other words match up, when the warp is on the loom. There are several ways to do this. I promised my Guild I would do another workshop in the Fall on hand painting warps using Tencel. Stay tuned, I’ll do a post about that workshop as well.
In my hand painted example below I chose to apply my colors in sections around the skein. Although I opened the skein into an oval with the insides of the skein not touching, I still had some color bleeding across the separation during the steaming process. I not only had beautiful gradations between the color transitions, but I also had splashes of additional colors as the dyes mixed with their neighbors “across the pond”. I love my result, however, if you want more distinct sections of color I would recommend the method we used in our workshop.

For our workshop, we applied the dye across the skein. This gives a mirrored effect on the yarn with less mixing of color during the steaming process. This mirrored effect should allow a skein to more closely mimic a true hand painted warp. Of course random splashes of color can also be beautiful.
Tip - Think about what colors will be next to each other. Will they blend into pleasing transitions? Or will the mixing of the two create an unwanted muddied color?

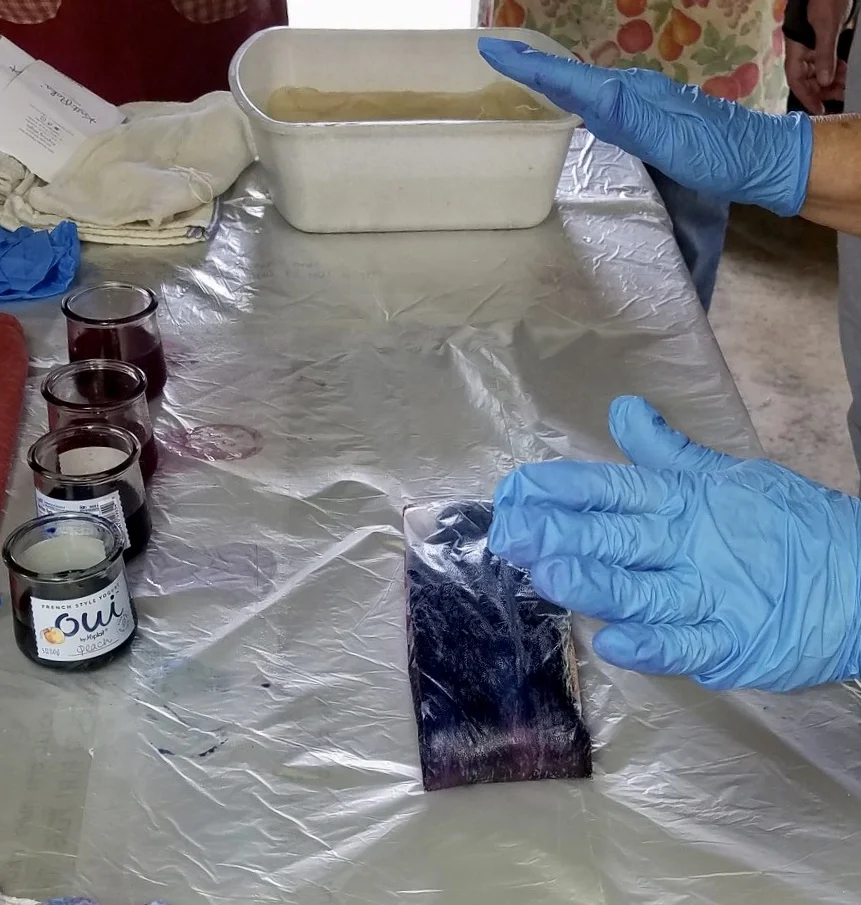
A length of plastic wrap a bit longer than the skein was placed on the table. Gently squeeze the excess water out of the wetted skein and lay it on top of the wrap. Donning gloves, pour the first little pot of mixed dye solution onto a section of yarn.
Tip- Start with the lightest color; if needed you can always add more of a darker dye over a lighter color.
This dye method requires a minimal amount of liquid; too much liquid will result in colors running everywhere and merging into unwanted mixes or worse yet, the dreaded “brown mud”. You can always add a bit more water to the little dye pot if more liquid is needed for coverage.
Some dyers use foam brushes to actually paint on the dye, but I find pouring works just great.

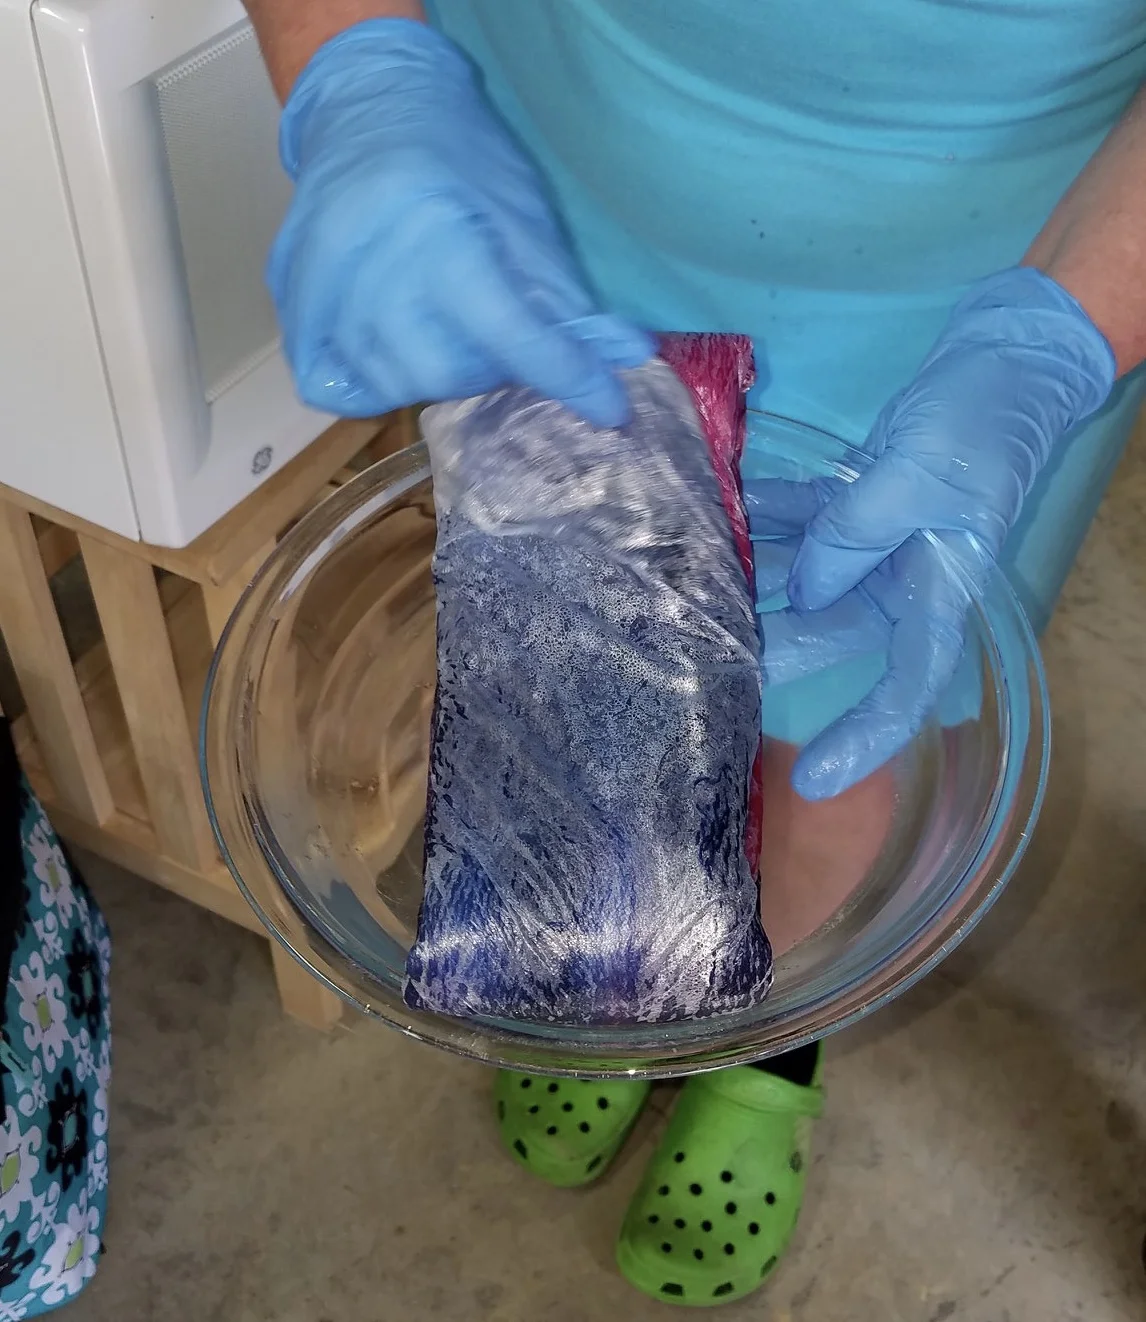
Subsequent colors are added in the same manner. After each addition, blend the color intersections with gloved fingers. The less mushing (such a descriptive word), the more distinct a color change; the more mushing, the transitions blend in gradations of color. Mushing also pushes the dye to penetrate through the skein. You can carefully lift the yarn to check the back for coverage.
Remember to wipe your gloves between colors to prevent accidental color mixing.

We did not add acid to the dye solutions, rather we spritzed both sides of our dyed skeins with 100% white vinegar. To prevent colors from running, don’t blast or excessively spray . Blot up any stray or excess dye puddles around the skein.

Wrap up the little hand painted yarn bundles; making sure the ends and edges are sealed to keep all the dye inside.
Fold the bundle into thirds and place in a microwave safe container and pop into a microwave. Each packet was heated on High for between 4 and 6 minutes; done in 1 minute increments . As I noted in my previous post, the blue dye took a little longer to exhaust.
The steamy bundle was removed from the microwave - caution it’s HOT . . .

. . . opened until cooled to room temperature; then rinsed in room temperature water.

Here are the gorgeous results hanging to dry.
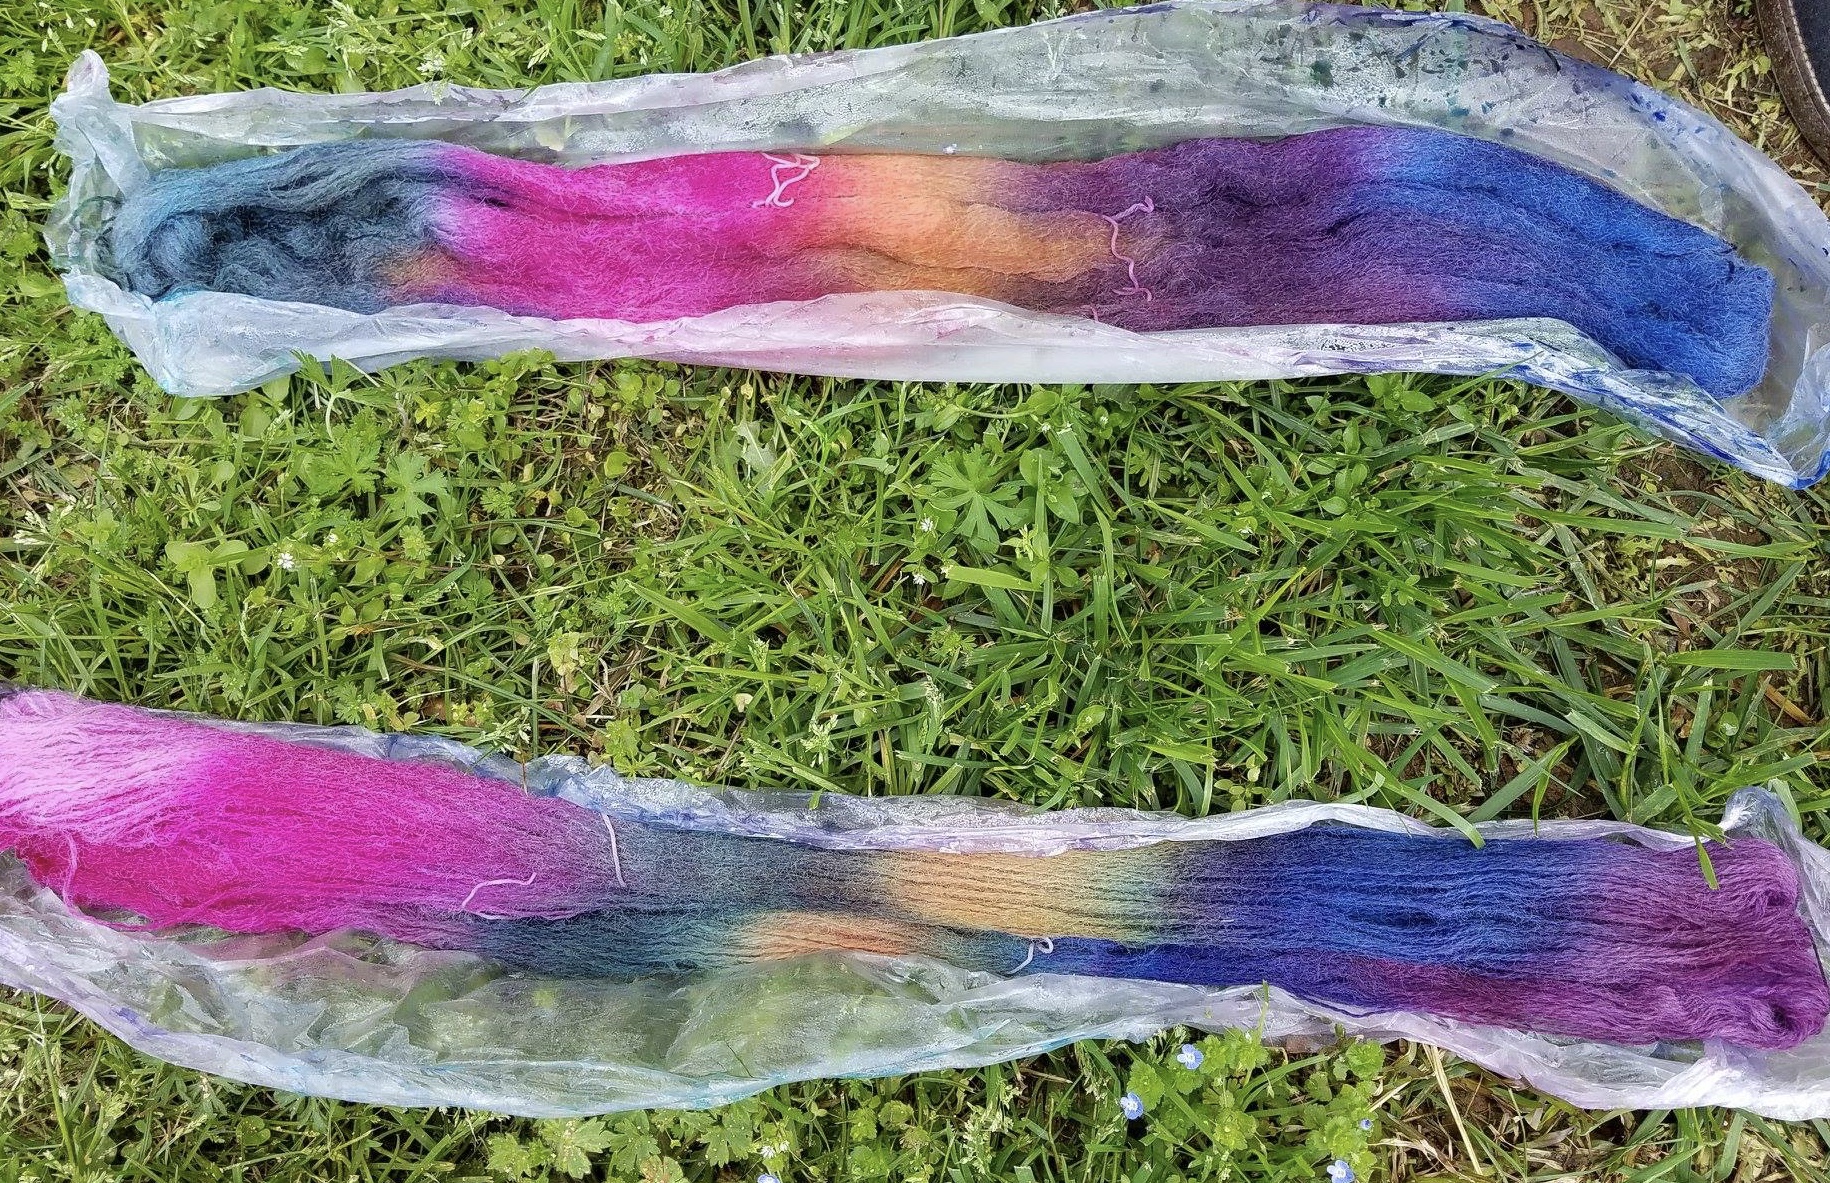
More pretty eye candy!

If you are interested in online dyeing courses, I highly recommend checking out the Dyeing Workshops at the School of Sweet Georgia.